Pages

Monday, June 13, 2016

Making Homemade French Galettes (Buckwheat Pancakes)

A Galette is a savoury buckwheat flour pancake that originates from the region of Brittany in France. It can be topped with egg, ham, cheese, spinach, salad, onions tomatoes, salmon, mushrooms, bacon...or whatever other toppings you might like. The most common variety has ham, emmentaler cheese, and egg.

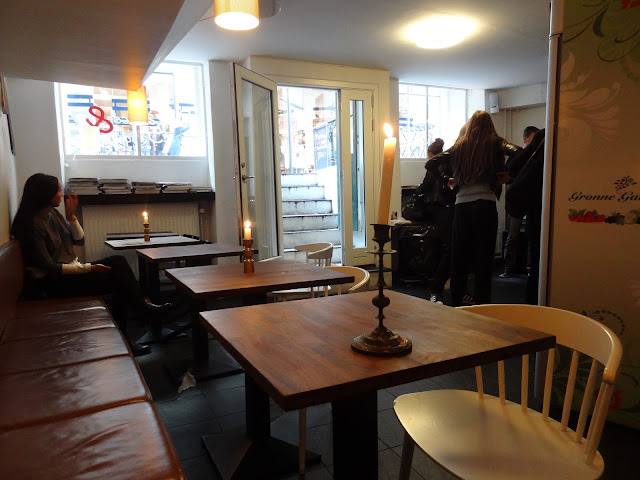
I first tried Galettes in Copenhagen, Denmark, and loved them instantly. The buckwheat flour has a really good flavor, it gets toasted in a pan with butter, and together with the toppings it is really delicious. It is perfect to eat for lunch or brunch since it is both filling, but also light.

I decided to try to make Galettes myself, and it's actually pretty easy. I don't have a special Galette pan or tool, but they still came out pretty good. The trick is to get the pan very hot before you pour in some of the batter, and make sure the pan is buttered, and the batter coats the pan. Don't worry if the first pancake you make doesn't come out right, it can be a bit tricky in the beginning just like it is making any kind of pancake.

I got the recipe from a french blog. It is really simple, and makes 10 Galettes. If you want to try to make them yourself I have translated the recipe below.

French Galettes 
(Yields 10)
300 grams buckwheat flour
8 grams crushed sea salt
750 ml filtered water

Directions
1. Mix the flour and crushed sea salt in a large bowl, slowly add in the water, and whisk until incorporated.

2. Let stand covered for 2 hours at room temperature.

3. Heat pan on a high setting.

4. Coat pan with butter once hot.

5. Add about half a cup (more or less) of the pancake batter to the hot pan, and move around to coat.

6. Bake the Galette until crispy, about 3 - 5 minutes, then gently flip it over.

7. Add your toppings in the middle of the Galette.

8. Fold all four sides slightly. The sides you folded should have no toppings. This is just to ensure every bite has toppings in it.

9. Serve on a plate.

Note: I did not use filtered water, but that could be why mine didn't come out as crispy in spots, but they still tasted delicious. I also didn't use any special tools.

You can also serve this with a salad on the side. I bought some mixed salad leaves, and added Good Seasonings Garlic & Herb salad dressing on top. :)

Hope you enjoy this recipe!

Plain Galette cooking in a pan
Galette with ham and emmentaler cheese

Galette with ham, emmentaler cheese, scrambled egg, and a side salad.


Wednesday, May 11, 2016

Rustic Italian Bread

Yesterday I bought Manitoba flour at my local grocery store in Copenhagen, and I noticed a recipe on the back for manitoba bread. It was so simple just yeast, water, flour, and salt. I decided to try it, and was blown away by the results. This is just the kind of Italian bread recipe I have been searching for, and it's so simple. It has a crunchy crust, but it's soft in the middle, and tastes pretty amazing. Not only that but I was surprised how pretty it came out, with little effort.

If you want to see how I made a Rustic Italian bread with Manitoba flour check out my video here:


Rustic Italian Bread
(1 large bread or 2 small breads)
Ingredients
3 grams dry yeast (2 1/4 tsp)
2 dl warm water (.84 US cups)
240 g manitoba flour (1 - 1 1/2cups)
5 g salt (1 tsp) regular or sea salt

Directions
1. Combine the yeast and water in a tall cup, cover with plastic wrap and let stand for 5 - 10 minutes.
2. Combine the salt and flour in a large bowl.
3. Add the yeast mixture to the flour/salt mixture.
4. Stir together until a dough forms.
5. Place dough on a lightly floured surface and knead it for 10 minutes.
6. Place the dough in a greased bowl, cover and let it rise for 1 hour.
7. Place the dough on a lightly floured surface to shape.
8. Pre-heat the oven to 230C/446F.
9. Pinch the sides of the dough together to create a smooth surface on top.
10. Hand roll the dough to form a baguette or shape it into a round ball or any way you want.
11. Dust the dough in flour, and cut slits in the dough with a sharp knife (optional).
12. Bake the dough for 20 minutes at 230C/446F and an additional 8 - 10 minutes at 200C/392F.


Tuesday, May 10, 2016

Pretzel Bread Recipe

Yesterday I decided to make Pretzel Bread. I had never made this before, but I got inspired by a friend's Facebook post of his adorable son munching on some pretzel bread at a restaurant. Yep, that's all it took for me to find a recipe and try to make it myself, and I am so glad I did.

This bread is so delicious. It is firm on the outside and chewy and soft on the inside. I even decided to use two of the larger buns to make Philly Cheese steak sandwiches for dinner, and it worked out really well. The recipe is below and if you want to see a video on how I made pretzel bread check out the video I made here:


Pretzel Bread
(Makes 8 large buns)

Ingredients
(for the dough)
1 ½ cups warm water
1 tblsp active dry yeast (1 package) 
2 tsp sugar
4 ½ cups all-purpose flour
2 tsp sea salt or kosher salt
4 tblsp butter, melted

(for the poaching & glazing)
1/4 cup baking soda
large saucepan of water
1 egg, lightly beaten
pretzel salt or sea salt

Directions
1. Combine the water, yeast, and sugar in a cup, cover, and let sit for 5 - 10 minutes.
2. In a large bowl, combine the flour, and salt.
3. Add the yeast mixture and melted butter to the flour mixture.
4. Stir together until a dough forms, then knead on a surface for 5 - 10 minutes or until smooth.
5. Place in a greased bowl, cover, and let rise for at least 1 hour or until double.
6. Divide the dough into 8 if you are making large buns or 16 if you are making small rolls.
7. Roll each dough into a ball by pinching the bottom of the dough and turning it, then lightly coat it with flour, and place on a baking sheet lined with baking paper.
8. Cover the balls of dough with a kitchen towel, and let rise for 30 minutes.
9. Meanwhile bring a pot of water (2 quarts) to almost boiling, lower the heat to medium, and add in the baking soda. Stir it altogether.
10. Then, place a ball of dough in the pot (pinched side/bottom side down), and let it sit for 30 seconds. Then, carefully flip it over and let the other side sit for an additional 30 seconds.
11. Place the dough back on the baking sheet (bottom side/pinched side down).
12. Repeat this until all the balls of dough have been in the warm water. You can do two at a time or more if you want, depending on the size of your pot.
13. Brush the tops of the dough with a beaten egg, and then sprinkle a bit of salt on top of each bun.
14. Take a sharp knife and make a slit on the top of the dough. I put two on the larger buns and one on the smaller rolls. This just makes them look nicer, so it's optional.
15. Bake them in a pre-heated oven set to 425F/218C for 15 - 20 minutes.

That's it. Hope you like this recipe. I'm not sure how to get the bread darker in color, maybe the water needed to be a little warmer or the buns needed to be in the water for a slightly longer time, but regardless the flavor and texture of the bread buns were really good.

Subscribe to my YouTube channel for more more yummy recipes. :o)


Friday, April 29, 2016

Queso Dip (without velveeta)

One of the snacks I miss most while living abroad is Queso (cheese dip). Anytime we had a party back home there was a guarantee that cheese dip was made. We usually made it with onions sauted in butter, then added in a can of rotel tomatoes, and velveeta cheese. It was also something I loved to order from restaurants, but a restaurant never uses velveeta cheese.

In the last month Danish grocery stores finally started to carry monterey jack cheese at the stores. This cheese was unavailable here before, and guess what? It is great for making cheese dip. So I developed my own recipe with the ingredients I have access to here, and it turned out to be pretty delicious. I made a video on how I make queso dip without velveeta which you can see below.


Queso Dip (without velveeta)
Ingredients
(serving size: small/medium bowl)
4 slices American Cheese
1/2 cup Monterey jack cheese (grated)
1/2 cup whipping cream
1 jalapeno (remove seeds and stem)
1 chili pepper (remove seeds and stem) - optional: for a spicy cheese dip
1/4 small onion
thin slice of butter (about 15 - 20 grams)
1 - 2 tblsp milk - optional: to help thin out the cheese dip

Directions
1. First, melt butter in a pan, and saute chopped onions, jalapeno, and chili pepper.
2. Add whipping cream to the pan, and bring it to a boil.
3. Lower the heat, and add in the monterey jack cheese. Stir until melted.
4. Then, add in the american cheese. Stir until melted.
5. Next, add in a few splashes of milk if the cheese dip is too thick.
6. Season with salt and pepper.
7. Serve as is, or for a more creamy queso, add the cheese dip to a food chopper and blend until smooth.
8. Serve in your favorite dish.

Note: I am pretty sure you could omit the american cheese, and add an additional 1/2 cup monterey jack cheese instead making a white queso dip, but I haven't tried this. The great thing about monterey jack cheese is that it does not become grainy and stays smooth. If you want to make larger quantities then double the recipe, but be careful about doubling the peppers. You could always saute the peppers whole, remove them from the pan, and add them in a little at a time until you think it's spicy enough.

Enjoy! :)

Note: this recipe made a little more cheese dip than pictured above.


Wednesday, April 27, 2016

Roasted Salsa Recipe

One of my favorite things to eat back home in San Antonio is Salsa. If you go to any Mexican restaurant in San Antonio you get a free bowl of salsa and chips to munch on, strangely enough, even at breakfast time. Anyways, It's always so good, and always homemade. At the grocery store back home, the Salsa aisle is kind of insane. There seem to be 100 different kinds, and every jar claims to be award winning or the best, but actually it's very very difficult to find one that tastes good. I always try one and end up being disappointed. The best ones are usually the freshly made Salsas in the refrigerated section. H.E.B. makes a really good fresh salsa btw.

Well, the salsa craze hasn't quite hit Denmark, yet, and I can see why. The salsa I have had here is pretty disgusting. It usually just tastes like a bowl of chopped tomatoes or pizza sauce. That is not Salsa. If I never had Mexican food before, and had to base my opinion on the Mexican food I have tried in Denmark, I would hate it, but that is to say not a lot of places make Mexican food to begin with here, and trust me the Danes have perfected so many other kinds of food. Also Mexico is pretty far from Denmark. :o)

Yesterday I decided to try to make Roasted Salsa. Surprisingly it was so easy to make, and tastes so much like the roasted salsa I love at Salsalitos restaurant in San Antonio. I found the recipe online here and I made a video which you can see below.


Roasted Salsa
Ingredients
1 1b. Plum Tomatoes (about 7 1/2 plum tomatoes)
1 tsp. sea salt
1 medium jalapeno pepper
2 medium cloves garlic
1/2 medium onion or 3/4 small onion
2 tsp. freshly squeezed lime juice (about 1/2 a lime)
sugar (optional)
cilantro (optional)

Directions
1. Rinse and dry the tomatoes and jalapeno. Then, warm up the oven, and set an oven safe pan/dish inside the oven to warm up. I set my oven to 248F/120C.
2. Chop 1/2 a medium onion into four chunks, set aside.
3. Slice each tomato in half.
4. Remove the pan/dish from the oven, and place the tomatoes (skin side down), jalapeno, garlic cloves (skin on), and onion on the pan/dish. Sprinkle salt evenly on the tomatoes.
5. Turn on the broiler in the oven, and place the pan/dish in the oven for about 10 minutes.
6. Then, turn over all of the ingredients, and broil for another 7 - 10 minutes or until toasted.
7. Remove pan/dish from the oven and let cool for about 10 minutes.
8. Then, add the tomatoes and onion to a food chopper.
9. Next, remove the stem, and seeds from the jalapeno, and roughly chop it into a few chunks, and add it to the food chopper.
10. Finally, remove the skin from the garlic cloves, and chop off the end piece, and add the garlic to the chopper.
11. Pulse everything until well mixed, then stir in the lime juice.
12. Add more salt, if needed.

Note: I used a grill pan in the oven, but you could use an oven safe frying pan or a baking dish. Alternatively you could try to toast the vegetables on the stove top on a high heat, although I haven't tried that.

The original recipe calls for cilantro and sugar. I did not add this to my recipe, and it tasted great, but you can add that if you wish.

Hope you enjoy this recipe! :o)


Thursday, April 21, 2016

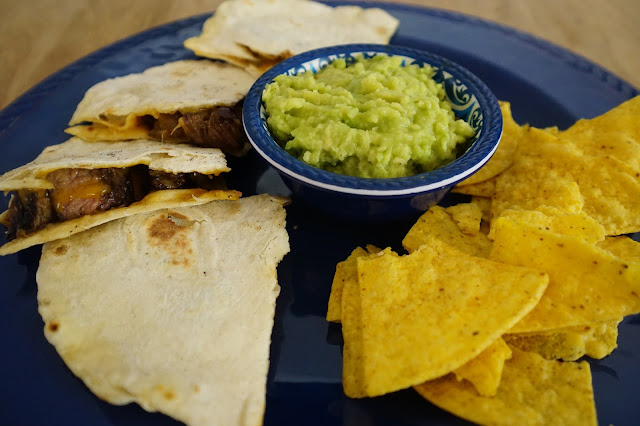
How to Make Quesadillas

Quesadillas are so easy to make. You can make them with just cheese, refried beans and cheese, fajitas and cheese or taco meat and cheese. I am surprised how in Europe so many places make quesadillas kind of weird, with whole chunks of boiled chicken breasts or corn mixed in. So I figured there might be some people out there who don't know how to make Quesadillas. If you want to learn how I make them, check out my video below.


Quesadilla Recipe
Ingredients
meat (beef fajitas, chicken fajitas, or taco meat) - optional
refried beans - optional
tortillas
butter - optional
cheese (cheddar, monterey jack, mozzarella, quesadilla...or a good melting cheese)

Directions
1. Butter one side of each tortilla (takes two tortillas to make one quesadilla).
2. Place cheese on top of the butter side of one tortilla.
3. Spread refried beans, or beef fajitas, or chicken fajitas, or taco meat on top of the cheese.
4. Sprinkle more cheese on top of the filling.
5. Place the tortilla with butter on top of the filling, butter side down.
6. Toast in a pan on a medium/low heat for about 3-4 minutes on each side.
7. Cut the quesadilla into 4 to 8 slices, like a pizza.
8. Serve with guacamole or chips and salsa, if you want.

That's it. It is way easier than it is described, and you can also just make a cheese quesadilla. The meat is optional, and the cheese types are just suggestions.You can also mix a white cheese and a cheddar cheese together. Hope you enjoy it!


Sunday, April 17, 2016

Best Soft and Light Homemade Dinner Rolls

I love homemade bread, but it's rare I find a recipe I love. Today, I found a really good recipe. I got the recipe from a home cook who shared her mother's bread recipe online. I will definitely be making this recipe again. The dinner rolls were light, soft, and really yummy. I think this recipe would be great as sandwich loaf bread too. I filmed how I made them, and you can see the video below.


If you want to make this recipe here it is!

Homemade Dinner Rolls
(Yields 16 Large/Medium Rolls or 2 loaves of bread)
Ingredients
1 tblsp yeast
1 tblsp sugar
1/2 cup warm water

5 cups flour
1/4 cup sugar
1/2 tblsp salt

1 1/2 cups warm water
1/4 cup oil

1 tblsp butter (for brushing)

Directions
1. Mix yeast, sugar, and warm water together in a tall glass, cover, and set aside.
2. In a large bowl, mix flour, salt, and additional sugar together.
3. Then, add the yeast mixture, additional warm water, and oil to the flour.
4. Stir together until a dough forms.
5. On a lightly floured board, knead the dough for at least 5 minutes, or until it comes together. I had to use an additional cup of flour when kneading. 
6. Place the dough in an oiled bowl, and cover and let rise for 1 hour.
7. After it has risen, shape the dough into rolls, and place them on a baking sheet lined with baking paper.
8. Brush the tops of the rolls with melted butter.
9. Cover with plastic wrap, and a tea towel, and let rise for 30 minutes.
10. Pre-heat the oven to 375F/190 C.
11. Bake the rolls for 30 minutes or until golden.

Note: The original recipe is a lot larger. I scaled it down in half, which made 16 large/medium dinner rolls. So the recipe written above is half the original recipe. If you want smaller rolls you can divide the dough into 32 pieces to make 32 small rolls. You could also make two loaves of bread with this recipe, although I haven't tried that yet. Also, I changed a few steps in the recipe, such as brushing the rolls with butter before you bake them, and not after. I hope you enjoy it.


Wednesday, April 13, 2016

How to make Homemade Flour Tortillas

Making flour tortillas from scratch is pretty quick and easy. In Denmark, you can only find some pre-made tortillas that taste really dry, and bland, so much so that they will ruin any meal you use them with. So what does that mean? I gotta make tortillas from scratch if I want them to be good. :o) The hard part can be rolling them out, and cooking them, but once you get the hang of it, it's pretty easy in the end. Here is a video on how I make homemade tortillas, and below is the recipe.


Ingredients
(makes 12 large tortillas)
2 cups flour
1/2 tsp. salt
2 tsp. baking powder
1 tblsp. coconut oil
3/4 cup warm water

Recipe
1. Mix the flour, salt, and baking powder in a medium bowl.
2. Add the coconut oil or oil of your choice, and mix it together with your fingers, until kind of resembling bread crumbs.
3. Add warm water, and mix together with a spoon or fork until a dough forms.
4. Knead the dough on a lightly floured surface for a minute or less until it becomes smooth.
5. Then, divide the dough into equal portions, and cover with plastic wrap and a towel.
6. Let the balls of dough rest for about 10 minutes.
7. Meanwhile, after 5 minutes, set a pan on the stove and let it heat up. I usually have it on a medium/high setting. It's important that the pan is hot enough when you start to cook the tortillas.
8. Roll a tortilla on a lightly floured surface. I usually press it down, and then roll it. You can roll it to the thickness you want.
9. Place the tortilla in the hot pan and cook it for a minute or two on each side. It is a good sign if it puffs up. Sometimes the first tortilla doesn't come out well, if the pan is not hot enough. Make sure to watch the tortilla closely and flip it over when it starts to brown.
10. Repeat this process until all tortillas have been made.


Monday, April 11, 2016

How to make Potato and Egg Breakfast Tacos

One of my favorite things to eat for breakfast are breakfast tacos. Something that surprisingly is unknown in most parts of the world, but in my hometown of San Antonio, Texas it is really popular. There are many varieties of breakfast tacos from sausage and egg, to bean and cheese, to chorizo and egg. One of my favorites are potato and egg tacos. Of course back home in Texas I usually would just dine in at my favorite Mexican restaurant or drive thru in the morning to pick up some breakfast tacos, but living in Denmark, I can't do that. Instead I have to make them myself. It is actually pretty easy, although a little more time consuming, since I have to make the tortillas as well.

So I made a video showing you how I make potato and egg breakfast tacos here in Denmark. You can see it below.


Basically, all you do is fry potatoes, scramble eggs, mix it together, and put it in a tortilla. Top it off with some salsa, and you have yourself a potato and egg breakfast taco. :o) I made the tortillas homemade, and will upload a video on how to make homemade tortillas soon. In the mean time this is how I make potato and egg breakfast tacos. :o)


Ingredients
Fried Potatoes
potatoes (1 1/2 small potato per taco)
onion, for flavoring (half an onion should be enough)
frying oil

Scrambled Eggs
eggs (1 per taco)
salt
pepper
butter

Tortillas

Directions
1. First, wash the potatoes and peel (optional) and chop them into cubes.
2. Next, season them with salt and pepper.
3. Then, slice an onion into large chunks (this will be removed later). If you want to eat the onion with your potatoes then chop it more finely.
4. In a small pot, fry the potatoes and onions together until tender. This should take about 10 - 15 minutes. The potatoes are not meant to be crispy, just cooked.
5. Meanwhile, crack the eggs in a bowl, season them with pepper, and mix them together. Set the eggs aside until ready to use.
6. Then, check if the potatoes are tender by poking a few with a knife. Remove the onions, drain the potatoes, and put the potatoes in a bowl lined with a paper towel, until ready to use.
7. Melt butter in a frying pan on medium heat, then season the eggs with salt, whisk them, and add eggs to the frying pan. Let them sit for a little bit to cook, and then stir them together. Remove the eggs from the heat once almost cooked, and continue to scramble them.
8. Then, add in the potatoes, and mix it altogether.
9. Finally, spread some butter on a tortilla (optional), and put some potato/egg in the center of the tortilla. Add in salsa, if you want, and that's it. I usually add salsa to mine but I didn't have any at the time. I hope you like this recipe!


Tuesday, March 29, 2016

How to make the Swedish Pastry Sockerbullar

Living in Denmark, it is easy to go to Sweden. It takes only 40 minutes from Copenhagen by car. So I sometimes go there, and I have enjoyed every pastry I have tried. The last time I went to Sweden (this last weekend), I picked up a Swedish pastry cookbook by the pastry chef Helene Johansson, so I could make these pastries I love at home.

The first recipe I tried to make was for the pastry called Sockerbullar (Sugar Buns). It is this light sweet bread with vanilla cream in the middle, rolled in sugar. The cream is suppose to represent the sun, and it is one of my favorite pastries to eat when I visit Sweden.


This recipe was actually pretty easy. I will translate the recipe below from Swedish to English so you can try it. I also made a video on how I made Sockerbullar, which you can see below.


The original recipe makes 35 sockerbullar, so I scaled it down to 6. If you want to make more than that, feel free to double the recipe. I hope you enjoy these. :o)

Sockerbullar
(makes 6 - 8)

Ingredients
(vanilla cream)
1 tsp. vanilla sugar or 1/4 vanilla bean
125 grams milk
1.5 egg yolks
31.25 grams sugar
12.5 grams corn starch
12.5 grams butter

butter for brushing
sugar for garneshing

Directions
1. Start this recipe by making the vanilla cream. First, mix milk and vanilla together in a saucepan, and bring it to a boil.

2. Meanwhile, in a separate bowl whisk the egg yolks, corn starch, and sugar together.

3. Then, pour in the hot milk mixture into the egg mixture, and combine.

4. Next, pour everything back into the saucepan, and whisk together until it thickens.

5. Then, add in the butter until melted.

6. Place it in the fridge to cool, until ready to use.

Ingredients
(bread)

18.75 grams yeast
125 grams cold milk
300 grams flour
50 grams sugar
50 grams butter (room temperature)
5 grams cardamom
1.25 grams salt

Directions
1. In a large bowl mix the yeast and milk together. Set aside

2. In a separate medium size bowl mix the flour, sugar, cardamom, and salt together. Then, add in the butter, and mix it into the dry ingredients until it resembles bread crumbs.

3. Next, add the flour mixture to the milk/yeast mixture. Stir together until a dough forms.

4. Knead the dough by hand for 12 minutes or until smooth and elastic.

5. Then, let the dough rest for 10 minutes.

6. Next, split the dough into 6 - 8 pieces, roll into balls, and place on a baking sheet covered with baking paper.

7. Cover the dough with plastic wrap, and a towel, and let rise for at least 1 hour.

8. Then, pre-heat the oven to 225 C/437 F.

9. Next, put the vanilla cream in a piping bag, and push it down into the center of each ball of dough, piping out the cream into the center as it's being pushed down.

10. Bake in the oven for 10 - 12 minutes.

11. Finally, after the bread has cooled a bit, brush the sides with melted butter, and roll into sugar.

That's it! I feel like the hardest part of this recipe is kneading the bread, and it's a bit tricky to roll into sugar, but hopefully the video I made will help.

Note: After making this recipe once, I think next time I will flatten the balls of dough just a bit so they aren't as tall. Also, I would like to try letting the dough rise for more than an hour, so the bread is even more light. I probably will also reduce the cardamom by half since it was a little strong. You can make these changes if you want, and let me know how it turns out. I hope you like this recipe.


Luby's Baked Potato Soup Recipe

In Texas, there is a chain called Luby's Cafeteria. It was a place I often ate at growing up, and I loved the food. So when I saw Luby's released a cook book with their recipes, I bought one, and have been cooking with it ever since. One recipe from this book I use the most is the Baked Potato Soup recipe. I never actually ordered any soup at Luby's, but if you want a great recipe for potato soup, this is it!

I usually divide the recipe in half, since it is just me and my boyfriend here, but I will type the full recipe below and you can divide it in half, if you wish. I modified the recipe a little bit so I will note what I leave out or do different.

I also made a video on how I make this recipe, that you can watch here:


Hope you enjoy it!

Luby's Baked Potato Soup Recipe
(serves 10)

Ingredients
1/2 cup chopped raw bacon
4 tblsp (56 grams) butter
1/2 cup all-purpose flour
pinched dried thyme leaves
1/8 tsp. nutmeg
1 chicken bouillon cube
10 cups chicken broth
8 cups peeled and diced potatoes
1 cup heavy whipping cream
2 tsp. salt
1 tsp. freshly ground black pepper
2 large potatoes, baked, peeled, and diced
1 dried bay leaf (optional)
1/2 cup sliced green onions (optional)
1 cups shredded american/cheddar cheese (optional)
1 cup diced white onions (optional)
1/2 cup sour cream (optional)

Directions

1. Place bacon and butter in a large saucepan/pot and cook bacon over medium heat for 8 to 10 minutes, until crispy. Stir often.

2. While the bacon is cooking, you should peel and dice the potatoes. 1 large baking potato usually equals 1 cup chopped potatoes. You can set them aside until you are ready to use them.

3. You can add white onions, if you want, and cook them for 3 minutes.

4. If you want bacon with a little crunch in your soup, then remove the bacon from the pot, and place it in a bowl lined with a paper towel, once it is crispy. Otherwise, just leave the bacon in the pot and continue the recipe.

5. Next, add in the flour, and using a whisk stir it. Cook the flour for about 1-2 minutes.

6. Then, add in the chicken stock, bouillon cube, thyme, nutmeg, and diced raw potatoes. I usually use water and extra bouillon cubes to make chicken stock, if you don't have chicken stock.

7. Bring it all to a boil, then reduce the heat, cover the pot with a lid, and let it simmer for 15 minutes.

8. While the soup is cooking, you can prepare the baked potatoes.

9. Pre-heat the oven to a high heat around 220C/428F. Then peel, and dice two large baking potatoes.

10. In a plastic food safe bag, place the diced potatoes, and drizzle them with olive oil. Then, season them with thyme, salt, and pepper.

11. Place the potatoes on a baking sheet lined with baking paper or an oiled baking pan, and bake them in the oven until tender, about 15 - 20 minutes. You should check on them as they cook.

12. Next, if the potatoes in the soup are tender, then mash them with a potato masher. For a creamier soup, you can also use a hand mixer/chopper, but be careful.

13. Then, add in the cream, and bring the soup to a boil. This will thicken the soup. You can add more cream if the soup is not thick enough.

14. Next, lower the heat, and season the soup with salt, and pepper. Taste the soup. You can also add in more thyme.

15. The soup is done now. Check on the oven baked potatoes, if they are finished then remove them from the oven.

16. Now for serving. Put some oven potatoes in a soup bowl, and add in hot soup, and some toppings like bacon, cheddar cheese, sour cream, and/or green onions.

That's it. I hope you enjoy this recipe. In the Luby's cookbook, instead of baking diced potatoes in the oven with seasonings like I do, it says to peel the potatoes, bake them whole, then dice them. You can do that as well if you want. It might take a bit longer, and the potatoes will be flavorless. I like my way better. :)

Happy Eating! :o)


Friday, March 25, 2016

Pizza Dough Recipe

This pizza dough has two different kinds of flour. It makes a really good thin and crispy pizza. It is a recipe by two Danish chefs that host a cooking show in Denmark called Spise med Price. I will translate the recipe to English below, and I also made a video showing you how I made this pizza. Hope you enjoy it!


Pizza Dough Recipe 

Ingredients
300 grams pizza flour (type 00 flour)
200 grams Plain flour or Durum Flour
1/2 tblsp. sea salt
2 tsp. dry yeast
2 tblsp. olive oil
3 deciliters water

Directions

1. In a tall glass or small bowl mix the yeast and warm water together. Cover and let sit for 5 - 10 minutes.

2. Then, in a large bowl mix both kinds of flour, and sea salt (crushed).

3. Then, make a well in the center of the flour, and pour in the yeast mixture and olive oil.

4. Mix together until a dough forms.

5. Next, form the dough into a ball, and on a floured surface, knead the dough for 5 - 7 minutes or until smooth and elastic.

6. Place the dough in a large bowl drizzled with olive oil, and coat the dough in the olive oil.

7. Cover the dough and let it rise for 2 hours or overnight.

8. Then, after the dough has risen, pre-heat the oven to the highest heat. If you are using a pizza stone, place it in the oven as well.

9. Next, punch down the dough and divide it into 3 or 4 if you want a super thin pizza. If you aren't using all the dough now, then place the dough you aren't using in a food safe plastic bag and put it in the fridge.

10. Then, stretch out the dough you are using or roll it out with a rolling pin on a lightly floured surface.

11. Move the flattened dough to a baking tray, or baking paper, once finished. You can also roll it out on a piece of baking paper but it's not that easy.

12. Add the sauce, cheese, and toppings, and then place in the oven. If you are using a pizza stone, then remove that from the oven, and carefully place the pizza on the stone.

13. Bake the pizza for 10 minutes or until it looks ready.

Tip: To avoid the dough having too much flour, you can add the yeast/water mixture to a large bowl first, then olive oil,  and then add in the flour/salt mixture little by little until a dough forms.


Wednesday, March 23, 2016

Jam Filled Butter Cookies Recipe

These cookies are a favorite of mine. They are buttery, slightly sweet, and with jam in the middle. I think they are called different names across the globe but I know them as Linzer cookies, and they are thought to have originated from Austria. I made a video on how I make these cookies, and the recipe is below the video. Hope you enjoy them! :)


Jam Filled Butter Cookies 
Ingredients
250g flour
200g butter, cut into small cubes
100g powedered sugar
pinch of salt
2 egg yolks
jam

Directions
1. Preheat the oven to 170C/325F

2. Place the flour, butter, icing sugar and salt into a bowl. Using your fingertips, rub the ingredients together until the mixture resembles breadcrumbs.

3. Add the egg yolks and mix until a dough forms. Turn out onto a lightly floured work surface and roll out to a thickness of about 0.5cm. Cut out shapes using a 4cm/1½in cutter.

4. Cut out the middle of half the cookies.

5. Place the cookies on a baking tray lined with parchment paper and bake them for 10 - 12 minutes.

6. After the cookies have cooled, place a small dollop of jam or spread jam on the whole bottom half of a cookie.

7. Then, place the top half of the cookie onto the bottom half spread with jam.

8. Repeat until all the cookies are complete.

Note: The original recipe can be found here.

Enjoy! :o)

Monday, March 21, 2016

Italian Parmesan Oregano Bread Recipe

This bread recipe is similar to the Parmesan Oregano Bread at Subway, a sandwich chain from the U.S.. It is so delicious and great for sandwiches, tapas, or simply just sliced on the side of a meal. It is really flavorful, crunchy on top, and soft on the inside. I usually just make one baguette or two small breads, but if you have a large family or simply just want two loaves of bread, then make sure to double this recipe. If you want to see a video on how I make it check it out here, otherwise the recipe is below. Hope you enjoy it!


Italian Parmesan Oregano Bread Recipe
(makes 1 baguette or 2 small loaves)

Ingredients
(For the dough)
2 1/4 tsp. dry yeast
3/4 cup warm water
1/2 tsp. honey
1 tsp. sea salt
2 cups all purpose flour

(for the topping)
1/4 cup parmesan cheese
1/2 tsp. garlic powder
1/2 tblsp. oregano
1 tsp. olive oil

Directions

1. Place the yeast, honey, and warm water in a large bowl. Cover and let it stand for 5 - 10 minutes.

2. In a separate bowl, whisk the salt and flour together. Then mix the flour into the yeast mixture, a little at a time, until it forms a dough.

3. Turn the dough out onto a floured surface and knead it for 5 - 7 minutes until smooth and elastic.

4. Place the dough in a lightly oiled bowl, and turn once to coat.

5. Cover the dough with plastic wrap and let it rise for 1 1/2 hours or until doubled in size.


  1. 6. Gently punch down the dough, and shape it. You can shape it into one baguette or two small round breads, if you decided to follow this recipe exactly.
  2. 7. Then, in a small bowl, combine the parmesan, oregano, and garlic powder together. Then, mix in the olive oil.
  3. 8. Next, rub a little olive oil on top of the bread, and rub on the parmesan mixture.
  4. 9. Let the dough rest for an additional 30 minutes.
  5. 11. Pre-heat the oven to 220C/425F.
  6. 10. Finally, in a preheated oven bake the bread for around 25 minutes.
Note: If you double the recipe, you don't need to double the yeast amount.

Sunday, March 20, 2016

Homemade Hamburger Helper Recipe

Growing up in Texas, my mom occasionally made Hamburger Helper for dinner. It came in a box, and was so tasty, and easy for her to make. I loved it, and I still love it. Now I live in Denmark, and Hamburger Helper is not here, so I had to learn how to make it myself, from scratch. I was surprised how easy it is to make, and how it tastes even better than the original. I made a video on how to make it from scratch, which is below, and the recipe is below this video. I hope you like it. :o)


Hamburger Helper Recipe
(serves: 2 - 3 people)

Ingredients
1/4 lb ground beef (or more)
1/4 small onion (cut thick)
1/4 tsp. garlic (minced)
3/4 cup whipping cream
1/2 cup hot water (or more)
1 cup elbow macaroni
1/8 tsp. sugar
1/4 tsp. salt
pinch black pepper
1/4 tsp. oregano
1/4 tsp. parsley
1/4 tsp. paprika
pinch chili powder
1/2 cup shredded cheddar cheese

Directions

1. Brown the ground beef in a pot or skillet over medium/high heat until cooked.

2. Add thick slices of onions, and minced garlic to the cooked meat and stir. Let it cook for about 5 minutes.

3. Remove the onions, and drain the meat, if necessary.

4. Add the seasonings/spices, the whipping cream, and hot water to the pot.

5. Bring it to a boil, then add in the pasta.

6. Cook the pasta according to package instructions.

7. Then, add the shredded cheese, and stir until melted. If the sauce is not thick enough, let it cook a little bit longer before serving.

8. Taste the hamburger helper and add more salt and pepper, if needed.

Tip1: When you add water to the pasta, just add enough so the pasta has enough liquid to cook in. If you cover the pot while it is boiling, then reduce the heat, and watch it closely so it doesn't spill over. I found that the longer the pasta needs to cook, the more water you need. You can always add more water while the pasta is cooking if it becomes too dry, but if you end up adding too much water it might dilute the flavor.
Tip 2: If the sauce is not thick enough, then let the finished hamburger helper cook a little bit longer before serving.

Happy eating!

Saturday, March 19, 2016

Best Buttermilk Biscuit Recipe

I have tried so many recipes for buttermilk biscuits, and finally found one that I love. They are so easy to make, and I often just whip them up quickly when I want to have some biscuits.

So the other day I made a video showing how I make my favorite buttermilk biscuit recipe. I uploaded it to my new YouTube channel. You can watch it below and make sure to subscribe if you want to see more cooking videos. The recipe is below the video. Note: In this video I only make half the recipe.


Buttermilk Biscuit Recipe
(makes 10 - 12 biscuits)

Ingredients

2 cups flour
1⁄4 tsp. baking soda
1 tblsp. baking powder
3/4 tsp. salt
6 tblsp. salted butter
1 cup buttermilk (or less)


Directions

1. Preheat oven to 232°C/450°F.

2. Combine the dry ingredients in a bowl, whisk. Then, cut the butter into chunks and mix with dry ingredients until it resembles breadcrumbs.

3. Next, add just enough buttermilk to form a dough (You might not use all the buttermilk). 

4. Then, turn the dough out onto a floured board and gently pat dough until it's about 1/2" thick. Do not use a rolling pin. Fold the dough about 2 - 3 times, and gently press the dough down until it is about 1 inches thick.

5. Use a round cutter to cut into rounds. Then, place the biscuits on a baking tray. Note: If you place the biscuits close together (touching each other) they will rise more in the oven. 

6. Bake for about 10-12 minutes or until golden brown.

Tip 1: To make drop biscuits, use all of the buttermilk. It will make a wet dough. Simply spoon balls of dough, a few inches apart, onto a baking sheet. Bake until golden brown.


Tip 2: To make buttermilk, put 1 tblsp. vinegar or lemon juice in a 1 cup measuring cup and fill the rest of the cup with milk. Let stand for about 5 minutes before using.

Tip 3: The biscuits rise even more if the dough is not too dry. So it's best to dust a slightly wet dough in flour before you cut out the biscuits.

Saturday, March 12, 2016

Best Burgers in Copenhagen

Burgers are one of my favorite foods. In Texas we have a lot of great burger places, and when I came to Copenhagen, although a lot of restaurants/cafes are making burgers, most of them just didn't live up to my standards. One of the biggest problems was the burger bun, it is sometimes too dense, dry, or hard. Other times it is the meat, it just doesn't have the right flavor, or it's shaped too small for the bun, so your first few bites are just bread.

A good burger to me has a light, and soft but slightly toasted bun, a juicy and flavorful patty, and good cheese. The fries are important too. Freshly cut fries that are crispy can really make a difference. When I order a burger with fries I want to enjoy the whole meal and not just the fries or just the burger, so both being good is definitely a plus.

Now that I have lived in Copenhagen for several years I have found some really amazing burgers. Below is a list of places where you can get the best burgers in Copenhagen.

Tommi's Burger Joint
Location: Høkerboderne 21-23 - Kødbyen

Tommi's Burger Joint is new to Copenhagen. It is a burger chain from Iceland that has been around since 2004, although the owner has been making burgers since 1981 under other names. Even though I've only tried it once (a couple of weeks ago) the burger I ate there is probably the best burger I have ever had in Copenhagen. The burger was grilled inside the restaurant and had a smokey grilled flavor. It was juicy, with quality meat, a really nice bun, and crispy thin fries. They even used a blow torch to melt the cheese just right. The bacon looked amazing as well. So next time I will definitely try a bacon cheeseburger. At Tommi's, a burger with fries, and a drink is 94 dkk, which is a pretty good price for Copenhagen.

The atmosphere was also really special, and I loved the music. Since when do you go to a burger place and say you love the atmosphere and music? It was pretty cool in there. When I went to Tommi's it was a Friday night, and super busy. The place is small, so there aren't a lot of seats, and although there were only a few people in front of me in line it took nearly 30 minutes for my food to be ready. With no place to sit, and being hungry, it was not the best experience. There was a line out the door the entire time, but the workers there were working so hard. They had 25 burgers going on the grill at a time, and 20 orders backed up, but they just couldn't keep up. Maybe that's just a testament to how good the burgers are, right?

I suggest to try Tommi's on a week day/night or during the summer when the weather is nicer and you can sit outside if you have to. I definitely recommend Tommi's Burger Joint though. You can tell they use quality ingredients, and they have an assortment of special complimentary sauces you can add to your burgers or fries. If you are a vegetarian, I heard they have a really good veggie burger as well. I'll being going back again soon for sure, but probably not on a Friday.


Luna's Diner
Location: Sankt Annæ Gade 5 - Christianshavn
                 Vesterbrogade 42 - Vesterbro

Luna's diner has two locations in Copenhagen, one in Christianshavn and a newer location in Vesterbro. It is a restaurant, and a cheeseburger with fries costs 129 dkk. The burger tastes really good, and the fries as well. You get to pick a dip for your fries and I always pick honey mustard, which tastes just like the honey mustard back home. I love it. I suggest getting water to drink with your meal. You can get a pitcher of water to share with free refills for 29 dkk, and it comes with fresh mint and lemon. It actually tastes really good.

Apart from the Burgers, Luna's Diner also serves soups, sandwiches, wok dishes, salads, pasta dishes, breakfast dishes, wraps, and has brunch on the weekends. So I'm sure you can find something for everyone on the menu. It's not your typical restaurant in Copenhagen, as there are many dishes on the menu inspired by American food that you might not otherwise find at a restaurant in Copenhagen. It's also very cozy inside.

Cheeseburger plain with mayo only (my favorite way to eat a burger), honey mustard dip, and fries
Sporvejen
Location: Gråbrødretorv 17 - Downtown

Sporvejen is another one of my favorite burger places. This one is located in an old street car, so it's really neat inside. When I have friends or family visit from Texas, I always take them to Sporvejen. Not only are the burgers really good, but it's such a cool place. There are also tables and chairs outside. It is located downtown, a bit off the beaten path from Strøget in a really beautiful square with other restaurants nearby.

They have a lunch burger special for 65 dkk for a burger with bacon and cheese, and fries are 24 dkk extra. I have only tried the beef burgers here but they also have chicken burgers and omelettes. The burgers are always juicy, and the fries are pretty good as well. Definitely a place worth checking out.


Bacon burger with ketchup, lettuce, tomato...and fries

Bacon cheeseburger with mayo and fries
Halifax
Locations: Frederiksborggade 35 - Downtown
                  Larsbjørnstræde 9 - Downtown
                  Trianglen 1 - Østerbro
                  Vesterbrogade 72 - Vesterbro
                  Raberbanegade 3 - Amager
                  Falkoner Plads 1 - Frederiksberg
                  Skolegade 9 - Valby

As you can see, Halifax has 7 locations in and around Copenhagen, and the first location opened in 2007. This is one of my Danish friend's favorite places to eat so I have been to Halifax many times. What's neat about Halifax is all burgers come with a side, and a dip. You can choose from regular fries, sweet potato fries, vinegar fries, coleslaw, salad, mashed potatoes, or nachos as a side (although it looks like they might have taken the nachos off the menu). Anyways I can't imagine eating mashed potatoes on the side of my burger but I guess some people like that. :o) There are also many unique varieties of burgers, for example I once got the Zihuatanejo with aioli, cheddar, jalapenos, guacamole, salsa, onion, and lettuce, and it was delicious, but messy, I will admit. :o)

The place has a really cozy, rustic, but modern feel to it. The company/brand signage or art work is also really well done. If you order food as take away, everything is packed really nicely, in packaging stamped with their logo and art work. It's really a neat place, and the food is very good. The menu is limited to burgers, and sides, but sometimes it's a good thing to not have too much on a menu. It gives you the ability to focus on these items even more. Halifax also has a lunch special during weekdays, so look out for that.

Burger with avocado, salsa, cheddar cheese, and lettuce


Standard burger without cheese


Condesa
Location: Ved Stranden 18 - Downtown

This next place is located downtown across from Christiansborg Slot, and it is only open for dinner. It's actually a mexican restaurant/bar that serves tacos, ceviche, oysters, chicken wings, cocktails, and beer, and no burgers...

Yep, that's right, burgers are not on the menu! I was reluctant to include this place on my list of the best burgers in Copenhagen, but I have to mention it. Last summer for one day, Condesa grilled burgers outside, and they were amazing. After we had those burgers we thought, great, now we know of another place to get a good burger, but when we checked the menu online, we noticed that burgers are not on the menu there. They do, however, have a spicy fried chicken burger on the menu only on Wednesdays and Thursdays.

Condesa, if you are listening, please consider also adding a beef burger to your menu. I really loved it! The bun was homemade, and just how I like it, the meat was of high quality, really flavorful, and juicy. I hope to see more of your burgers in the future.

If the burger was that good, I'm sure the rest of their food must be amazing as well. So perhaps, those of you reading this, should just check out this restaurant anyways, and look out for a future Condessa pop-up burger summer grill party. :) Hopefully it happens again.


So that is it. I will add more pictures soon, and if you have a favorite place to get burgers in Copenhagen, please let me know. :o)

Friday, March 11, 2016

Best Pizza in Central Copenhagen

If you are ever in Central Copenhagen and looking for a cheap place to eat, these are my favorite pizza places there, in no particular order.

Pizza Huset
Location: Gothersgade 21

I first discovered this place when I was studying abroad in 2004 in Copenhagen and living near Kongens Nytorv, which is just around the corner from Gothersgade. Pizza Huset has been open since 1985, it is Italian run, and they make both sandwiches and pizza. They use fresh ingredients, and fresh buffalo mozzarella, which is a bit of a rarity in Copenhagen. The crust is thin, but crispy and bubbly, and the sauce has a nice flavor. This place can get pretty busy, but the service is always fast, and friendly.

During the summer I like to grab a pizza from Pizza Huset, and eat it in the nearby Kongens Have on the grounds of Rosenborg Castle. It is one of the best pizzas you can find in Copenhagen, and at an affordable price. Definitely check it out!

Slice of Copenhagen
Location: Sværtegade 3

Sometimes I explore Copenhagen. I walk down streets I've never been and find hidden gems like this place, Slice of Copenhagen. It is located in the heart of downtown, but down some random side street, that you might not know exists. This is why you probably won't find many tourists here.

It is one of my favorite places to eat lunch when I am out shopping on Strøget. This place has been open since 1994 and is located in a basement. They only sell pizza slices, sandwiches, and drinks. A "pizza slice" in Copenhagen is not what you think it is. It's not a triangle shaped slice of pizza. Instead a big sheet of pizza is baked, and cut into large squares, that are then folded, and wrapped in paper, so you can eat it on the go. It is delicious!

I always get the pizza slice with pepperoni, drizzled with a garlic olive oil. I recommend getting the garlic or chili oil drizzled on the pizza, since these slices don't have a lot of tomato sauce. It also gives it an extra flavor. They have several varieties of pizza slices here and they are all on display so you can easily choose which one you want. There are tables and chairs to sit inside, and outside, but if the place is busy there can sometimes be no seats. Luckily, since the pizza is take away ready, it's easy to eat it outside while walking or you can find a bench nearby to sit. A slice of pizza usually costs 35 dkk, and Slice of Copenhagen is closed on Sundays.


Pizza Slice with Pepperoni


Pizzeria La Fiorita
Location: Charlotte Ammundsens Plads 2

This next place is located near Nørreport and the lakes in Copenhagen. It is in the basement and they serve homemade pasta dishes, sandwiches, pizza, baked potatoes, salads, and fresh baked bread, as well as Italian coffee, dry pasta, and other Italian specialties. I have only tried the pizza, but the pasta dishes look very good, and the prices are cheap for Copenhagen. They even have a special dish of the day for a lunch price, and lunch specials on the pizzas. This is not your standard Pizza takeaway place in Copenhagen. They have restaurant dishes at take away prices, and you aren't served in a paper box or aluminum foil dish, but if you dine in you are given a plate or bowl and knife and fork.

The pizza here tasted just like the Italian pizza I had in Milan, Italy. It's like stepping in Italy, while in Copenhagen. The place is usually pretty busy, and seating is limited inside, but if the weather is nice there are quite a lot of tables outside as well. Also, across the street is their Gelato shop, so you can get dessert too. Who doesn't love Gelato? :)


white chocolate, pistachio, and caramel gelato


Those are my top picks. Do you have a favorite pizza place in Central Copenhagen?

More pictures will be added soon!